Difference between revisions of "ValueCorrection"
Cheeseplus (Talk | contribs) m (5 revisions) |
EricChadwick (Talk | contribs) (fixed images) |
||
| Line 7: | Line 7: | ||
The following Photoshop technique will help you remove value variation but retain the hue variation. | The following Photoshop technique will help you remove value variation but retain the hue variation. | ||
| − | {| | + | {| class="wikitable" style="width:512px;" |
| + | |Step 1: Here is a common source image, which looks ripe for usage as a texture! | ||
|- | |- | ||
| + | |[[image:value_correction_step1.jpg]] | ||
|- | |- | ||
| + | |Image from [http://www.cgtextures.com] | ||
|} | |} | ||
| − | {| | + | {| class="wikitable" style="width:512px;" |
| + | |Step 2: Using Filter -> Other -> Offset reveals that there is uneven lighting in this image, making it difficult to tile. How unfortunate! | ||
|- | |- | ||
| + | |[[image:value_correction_step2.jpg]] | ||
|- | |- | ||
| + | |Image by [http://www.carlosmontero.com Carlos 'cman2k' Montero] | ||
|} | |} | ||
| − | {| | + | {| class="wikitable" style="width:512px;" |
| + | |Step 3: Go to Image -> Mode -> Lab Color. In your channels, notice that you now have a LIGHTNESS channel. select that channel and notice how you can see clearly how much value variation exists! | ||
|- | |- | ||
| + | |[[image:value_correction_step3.jpg]] | ||
|- | |- | ||
| + | |Image by [http://www.carlosmontero.com Carlos 'cman2k' Montero] | ||
|} | |} | ||
| − | {| | + | {| class="wikitable" style="width:512px;" |
| + | |Step 4:Go to Filters -> Other -> High Pass and vary the amount until most of the lighting variation is gone. In addition, you can use dodge and burn in this mode to try and hand-fix value variation problems and try to get things as even as possible. | ||
|- | |- | ||
| + | |[[image:value_correction_step4.jpg]] | ||
|- | |- | ||
| + | |Image by [http://www.carlosmontero.com Carlos 'cman2k' Montero] | ||
|} | |} | ||
| − | {| | + | {| class="wikitable" style="width:512px;" |
| + | |Step 5: Notice that much of your Value variation is now gone! | ||
|- | |- | ||
| + | |[[image:value_correction_step5.jpg]] | ||
|- | |- | ||
| + | |Image by [http://www.carlosmontero.com Carlos 'cman2k' Montero] | ||
|} | |} | ||
| − | {| | + | {| class="wikitable" style="width:512px;" |
| + | |Step 6:Some standard clone-brushing helps you create a tiling texture like you normally would. | ||
|- | |- | ||
| + | |[[image:value_correction_step6.jpg]] | ||
|- | |- | ||
| + | |Image by [http://www.carlosmontero.com Carlos 'cman2k' Montero] | ||
|} | |} | ||
| − | {| | + | {| class="wikitable" style="width:512px;" |
| + | |Step 7: Using Levels and Offset again shows that you have a wonderful tiling texture with very little tiling problems. As a happy side-effect, this technique also has a habit of subduing lighting information (shadows & highlights) which is great for dynamic lighting with normal maps and specular in most engines. | ||
|- | |- | ||
| + | |[[image:value_correction_step7.jpg]] | ||
|- | |- | ||
| + | |Image by [http://www.carlosmontero.com Carlos 'cman2k' Montero] | ||
|} | |} | ||
Revision as of 07:16, 26 September 2014
Value Correction
Value correction is a texturing method that allows you to remove problems in value variation from a source image. This is a common problem when trying to create tiling textures, and is often due to uneven lighting in the source image.
Lab Color Technique
The following Photoshop technique will help you remove value variation but retain the hue variation.
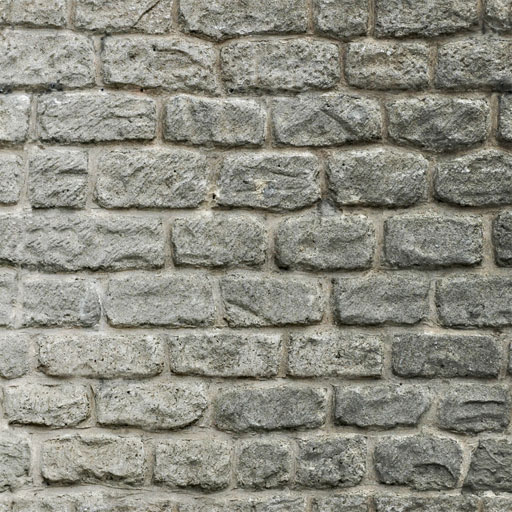
| Step 1: Here is a common source image, which looks ripe for usage as a texture! |
|
| Image from [1] |
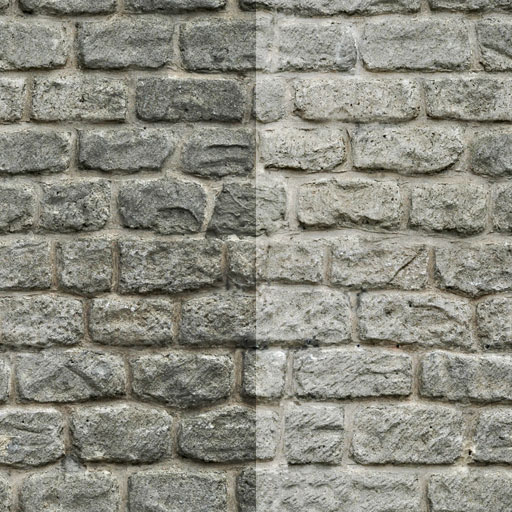
| Step 2: Using Filter -> Other -> Offset reveals that there is uneven lighting in this image, making it difficult to tile. How unfortunate! |
|
| Image by Carlos 'cman2k' Montero |
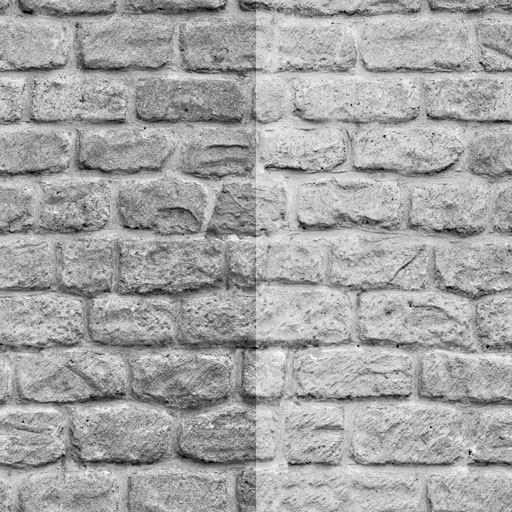
| Step 3: Go to Image -> Mode -> Lab Color. In your channels, notice that you now have a LIGHTNESS channel. select that channel and notice how you can see clearly how much value variation exists! |
|
| Image by Carlos 'cman2k' Montero |
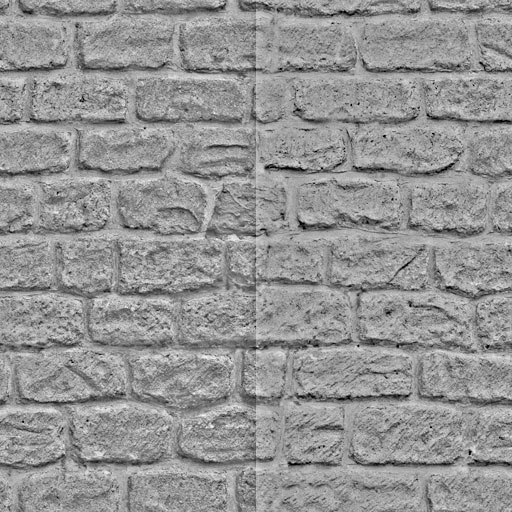
| Step 4:Go to Filters -> Other -> High Pass and vary the amount until most of the lighting variation is gone. In addition, you can use dodge and burn in this mode to try and hand-fix value variation problems and try to get things as even as possible. |
|
| Image by Carlos 'cman2k' Montero |
| Step 5: Notice that much of your Value variation is now gone! |
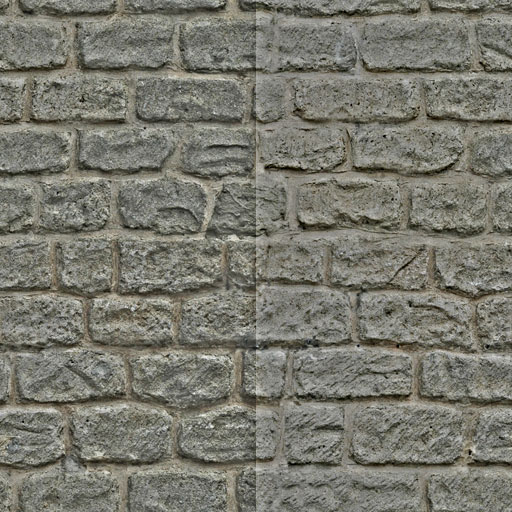
|
| Image by Carlos 'cman2k' Montero |
| Step 6:Some standard clone-brushing helps you create a tiling texture like you normally would. |
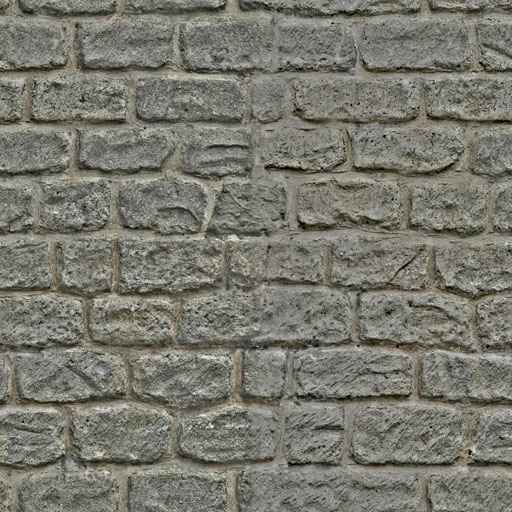
|
| Image by Carlos 'cman2k' Montero |
| Step 7: Using Levels and Offset again shows that you have a wonderful tiling texture with very little tiling problems. As a happy side-effect, this technique also has a habit of subduing lighting information (shadows & highlights) which is great for dynamic lighting with normal maps and specular in most engines. |
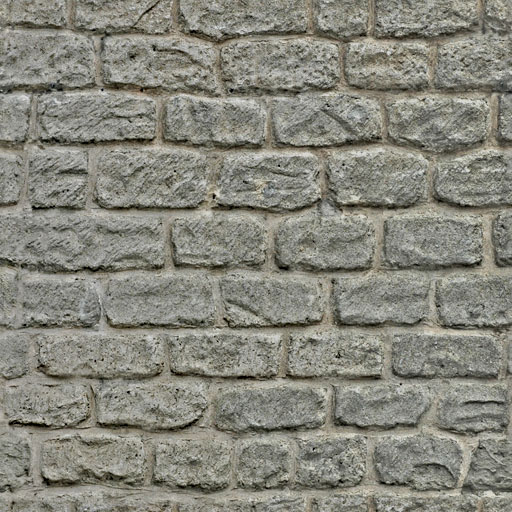
|
| Image by Carlos 'cman2k' Montero |
Note: This is useful for removing contrast, but some of that contrast is good to have and you may not want to remove it all. Experiment with keeping a copy of image that hasn't been equalized in this way, and masking contrast back in only where you want it. For instance, you could make a value-equalized version and paint it in only over the seams you are trying to remove.
Original thread: http://www.polycount.com/forum/showthread.php?p=1169603#post1169603