Difference between revisions of "Cube map"
EricChadwick (Talk | contribs) (→Software: alphabetical) |
EricChadwick (Talk | contribs) (→V-Ray Cube Map Rendering: figured it out!) |
||
| Line 130: | Line 130: | ||
==== V-Ray Cube Map Rendering ==== | ==== V-Ray Cube Map Rendering ==== | ||
| + | V-Ray's [http://docs.chaosgroup.com/display/VRAY3/Camera#Camera-CameraType "Box" camera type] will render a vertical cubecross with no GI seams. | ||
| + | |||
| + | # Place a VRayPhysicalCamera in your scene, pointing where you want the cube Front to be. | ||
| + | # Render Setup: | ||
| + | #* Output Size = 3x wide, 4x tall. For example, if you want 1024x1024 for each cube face, then render 3072x4096. | ||
| + | #* Save File = set your filename, location, format, for the cubecross render. | ||
| + | #* V-Ray tab, V-Ray:: Camera, Type = Box, Override FOV = 90. | ||
| + | # Render. | ||
| + | |||
| + | If you need to convert the vertical cubecross into six cube faces, you can use the Material Editor to do it: | ||
| + | # Load the cubecross bitmap in the Material Editor. | ||
| + | # U Tiling = 0.33333 | ||
| + | # V Tiling = 0.25 | ||
| + | # Turn on Auto Key to animate the following: | ||
| + | #* To see the +X cube face, at frame 0... U Offset = 1.0, V Offset = -0.5, W Angle = 0. | ||
| + | #* To see the -X cube face, at frame 1... U Offset -1.0, V Offset -0.5, W Angle 0. | ||
| + | #* To see the +Y cube face, at frame 2... U Offset 0, V Offset 1.5, W Angle 180. | ||
| + | #* To see the -Y cube face, at frame 3... U Offset 0, V Offset -0.5, W Angle 180. | ||
| + | #* To see the +Z cube face, at frame 4... U Offset 0, V Offset -1.5, W Angle 180. | ||
| + | #* To see the -Z cube face, at frame 5... U Offset 0, V Offset -0.5, W Angle 0. | ||
| + | # Right-click on the sample image, Render Map, Range = 0-5, Dimensions = (choose your resolution), Files = (set file prefix, location, format). | ||
| + | # Render. | ||
| + | |||
| + | This will create six perfectly-seamless cube faces. | ||
| + | |||
| + | ==== 3ds Max to Unity ==== | ||
* [http://www.pixelenvision.com/2242/maxscript-vray-cubemap-generator-for-unity/ Maxscript – Vray Cubemap Generator for Unity] creates a default 3ds Max camera at the origin and renders six cubemap faces, named to match Unity's convention. | * [http://www.pixelenvision.com/2242/maxscript-vray-cubemap-generator-for-unity/ Maxscript – Vray Cubemap Generator for Unity] creates a default 3ds Max camera at the origin and renders six cubemap faces, named to match Unity's convention. | ||
Revision as of 19:51, 25 July 2015
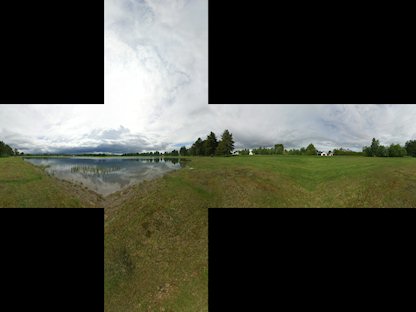
A cubemap is six images that are mapped onto a cube, creating a 360° panorama. Cubemaps are supported natively in graphics hardware so they're really quick to transform and render, because of this there's a unified method for rendering them in games.
|
| A cubemap in horizontal-cross format. Image by Emil 'Humus' Persson |
The cube is usually centered on the current viewpoint or camera. This means, when used as a backdrop or skybox it always appears infinitely distant. If you turn on wireframe mode in any 3d engine using a cubemap skybox, you'll see the geometry of the box. In the end it's just a regular mesh object.
Contents
Reflections & Lighting
When used for reflections, the reflection cubemap is usually centered on the mesh object. The viewing angle bounces off the mesh surface at an angle opposite to the surface normals, so it points to particular parts of the cube map.
Cubemaps can also be used for soft ambient-occlusion-like environment lighting, by using a diffusely convolved cubemap.
Another method is a Spherical environment map, which maps a single image to use as a reflection similar to the behavior of a Billboard.
Creating Cubemaps
Layouts
Different tools expect different cubemap layouts.
| Cubemapgen | 3ds Max | Maya | CryENGINE 3 | Unity |
| +X | _RT | Left -X | ||
| -X | _LF | Right +X | ||
| +Y | _UP | Top +Y | ||
| -Y | _DN | Bottom -Y | ||
| +Z | _BK | Front (+Z) | ||
| -Z | _FR | Back (-Z) |
Angular Distortion
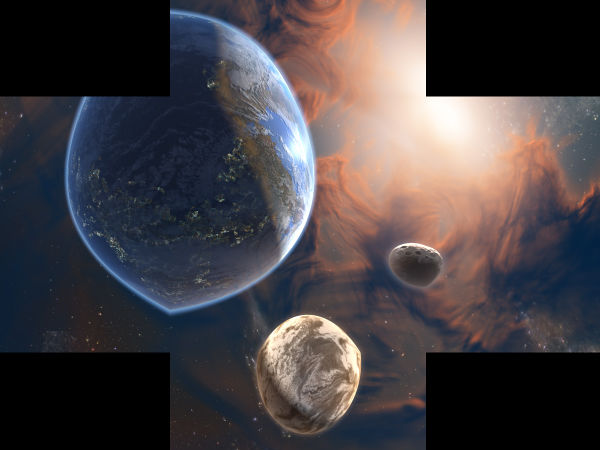
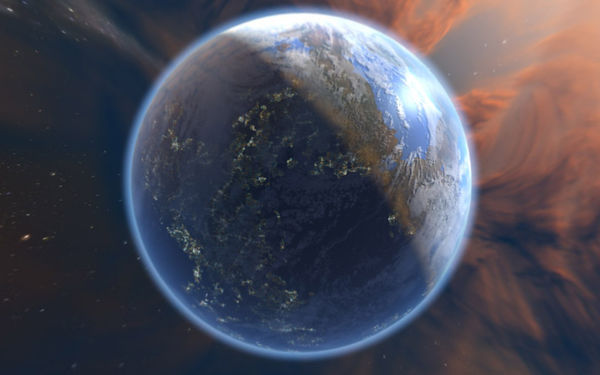
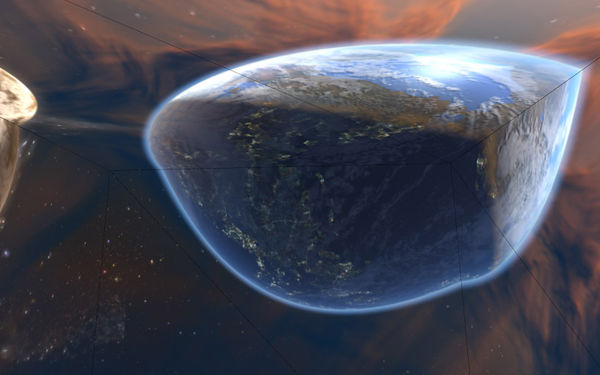
A cube map has to be created with some angular distortion in order to display a seamless panoramic image.
A cube map is always displayed from a viewpoint in the center of a cube mesh. This means the center of each cube face is closer to you than the edges and corners are. To counteract this, a cube map needs angular distortion.
This distortion becomes more obvious when you view it at any other angle, other than from the center of a cube.
Cube Map Formats
The bitmaps for each of the six sides need to be square, each needs to be powers-of-two in size (128, 256, 512, etc.), and all six images need to be the same resolution.
Usually for games you store the bitmaps all in one file using DDS or another compressed format, though some editors prefer them stored as six separate bitmaps (then compress them internally).
3ds Max
There are multiple ways to create cubemaps in 3ds Max.
- Metal Bump9 ... saves directly into DDS cubemap format, but it's limited to 256x256 and you can't set the DDS compression format (it always uses ARGB, which is uncompressed).
- Reflect/Refract Map ... more steps, but you're not limited to a particular resolution or format. However, does not support more than 24bit color, you can't output HDR with it. Also V-Ray does not support the Reflect/Refract map.
- Create six cameras ... a lot more work, but you can render HDR output, and use any renderer you wish. Here's a zip file with the six cameras: cameras_six_for_rendering_cube_views.zip
3ds Max can display cubemap reflections in real-time if you use the DDS cubemap format and a DirectX Shader material.
Metal Bump9
- Setup a 3D scene you wish to render into a cubemap.
- Place some type of object at the viewpoint you wish to render the cubemap from, for example a camera or a point helper or a geometric object. The orientation of the object doesn't matter, and the object itself won't be rendered into the cubemap.
- Create a Standard material, open the DirectX Manager rollout, and change the None flyout to Metal Bump9.
- Press Pick object and create and select the object.
- Choose a name and a location to render to.
3ds Max will render it directly into DDS cubemap format, but it's limited to 256x256, and you can't set the DDS compression (it uses ARGB).
Reflect/Refract Map
- Setup a 3D scene you wish to render into a cubemap.
- Place some type of object at the viewpoint you wish to render the cubemap from, for example a camera or a point helper or a geometric object. The object itself won't be rendered into the cubemap.
- Setup your rendering options (texture filtering, anti-aliasing, etc.).
- Create a Standard material and load a Reflect/Refract map into any slot.
- In the map, set Source = From File.
- Set the Size spinner to the resolution you want to render. If you're going to use the cubemap for a game it should be a powers-of-two number (128, 256, 512, etc.).
- Use the Render Cubic Map Files / To File: button to set the prefix name and bitmap format to render to.
- Press Pick Object and Render Maps and select the viewpoint object.
The six rendered bitmaps will automatically be loaded into the Reflect/Refect map, or you can convert them into a DDS cubemap with Dxtex or another tool.
Warning: The render cannot be canceled once the object is picked, so save your Max file before rendering, in case Max freezes!
- How the Hell do I make a cubemap with my own art? by Jude Godin walks through the process step-by-step, to create a hand-painted cubemap.
Create Six Cameras
- Here's a zip file with the six cameras: cameras_six_for_rendering_cube_views.zip
- Adaptive renderers may create seams, because the lighting calculations are done individually for each camera. You may be able to solve this by pre-caching the lighting passes. V-Ray can render a single panoramic camera, which can be converted into cube faces, see 360 panorama in 3ds Max tutorial.
V-Ray Cube Map Rendering
V-Ray's "Box" camera type will render a vertical cubecross with no GI seams.
- Place a VRayPhysicalCamera in your scene, pointing where you want the cube Front to be.
- Render Setup:
- Output Size = 3x wide, 4x tall. For example, if you want 1024x1024 for each cube face, then render 3072x4096.
- Save File = set your filename, location, format, for the cubecross render.
- V-Ray tab, V-Ray:: Camera, Type = Box, Override FOV = 90.
- Render.
If you need to convert the vertical cubecross into six cube faces, you can use the Material Editor to do it:
- Load the cubecross bitmap in the Material Editor.
- U Tiling = 0.33333
- V Tiling = 0.25
- Turn on Auto Key to animate the following:
- To see the +X cube face, at frame 0... U Offset = 1.0, V Offset = -0.5, W Angle = 0.
- To see the -X cube face, at frame 1... U Offset -1.0, V Offset -0.5, W Angle 0.
- To see the +Y cube face, at frame 2... U Offset 0, V Offset 1.5, W Angle 180.
- To see the -Y cube face, at frame 3... U Offset 0, V Offset -0.5, W Angle 180.
- To see the +Z cube face, at frame 4... U Offset 0, V Offset -1.5, W Angle 180.
- To see the -Z cube face, at frame 5... U Offset 0, V Offset -0.5, W Angle 0.
- Right-click on the sample image, Render Map, Range = 0-5, Dimensions = (choose your resolution), Files = (set file prefix, location, format).
- Render.
This will create six perfectly-seamless cube faces.
3ds Max to Unity
- Maxscript – Vray Cubemap Generator for Unity creates a default 3ds Max camera at the origin and renders six cubemap faces, named to match Unity's convention.
DxTex
Microsoft's DxTex offers a way to create a single DDS cube bitmap from six bitmaps. DxTex is automatically installed when you install the DirectX SDK. Once installed it will be found in the folder (SDK root)\Utilities\Bin\x86 or x64. Use the x86 version unless you're running a 64bit OS. There's also a DDS plugin for Photoshop in the SDK, it expects a 1x6 layout in Photoshop:
- +X
- -X
- +Y
- -Y
- +Z
- -Z
The DDS format does not actually store the images in a horizontal layout... each image is stored as a separate layer or slice in the DDS file. The DxTex plugin merely lays them out horizontally to make the cubemap easier to edit in Photoshop.
How to compile a DDS cubemap in DxTex:
- Open an existing texture by selecting the File -> Open... menu item.
- Select the Format -> Make Into Cube Map... menu item.
- The current texture will occupy one face of the cube map. From the dialog that pops up, select which face you want the texture to occupy, and click OK.
- For each of the other cube faces, select the View->Cube Map Face menu item and select a face from the list that appears.
- Select the File->Open Onto This Cubemap Face... menu item and select a texture to open from the dialog that pops up.
Hugin
Hugin can be used to convert a 3ds Max cube map into a rectilinear panorama:
- Make sure the six cube map image files are in TIF format. Hugin doesn't load TGA.
- Start Hugin.
- "Images" tab.
- Load the six images.
- Yaw and Pitch:
1.a. _BK = Yaw 0, Pitch 0
1.a. _DN = Yaw 0, Pitch -90
1.a. _FR = Yaw 180, Pitch 0
1.a. _LF = Yaw -90, Pitch 0
1.a. _RT = Yaw 90, Pitch 0
1.a. _UP = Yaw 0, Pitch 90
- Feature Matching = Align image stack.
- "Camera and Lens" tab.
- Lens type = Normal rectilinear.
- Degrees of view = 90.
- "Stitcher" tab.
1/ Projection = Equirectangular.
- Canvas size = 4x the width of a single cube map image, 2x the height.
- Panorama Outputs = High dynamic range.
- Stitch!
- Use XnView to convert to low dynamic range (Gamma 1.66 seems good).
Lys
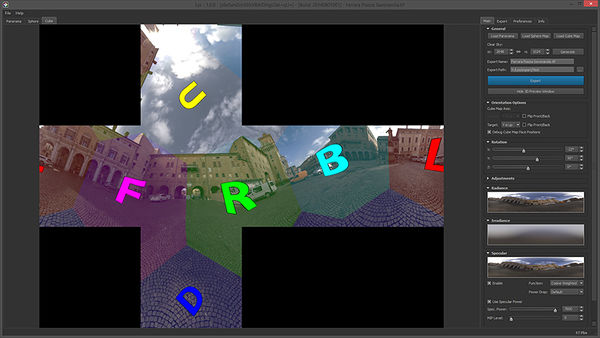
"Lys is an ultra-fast GPU powered solution that sets the standard for generating Radiance, Irradiance and Specular textures from panoramic, Sphere or 2d cube map cross source textures for use with HDR Image Based Lighting."
Maya
The easiest way to render a Maya scene into a cubemap is to use six cameras, then stitch the six images together into a cubemap.
Workflow tips can be found in the Polycount thread [[Maya 2009 how to render an environment map?]].
Photoshop
The NVIDIA DDS plugin for Photoshop is one way to create DDS cubemaps. It expects you to lay out the faces of the cubemap horizontally: +X -X +Y -Y +Z -Z. In 3ds Max terms this is: RT, LF, UP, DN, BK, FR.
The DDS format does not actually store the images in a horizontal layout... each image is stored as a separate layer or slice in the DDS file. The Nvidia plugin merely lays them out horizontally to make the cubemap easier to edit in Photoshop.
Unreal Engine
Cubemap Seams
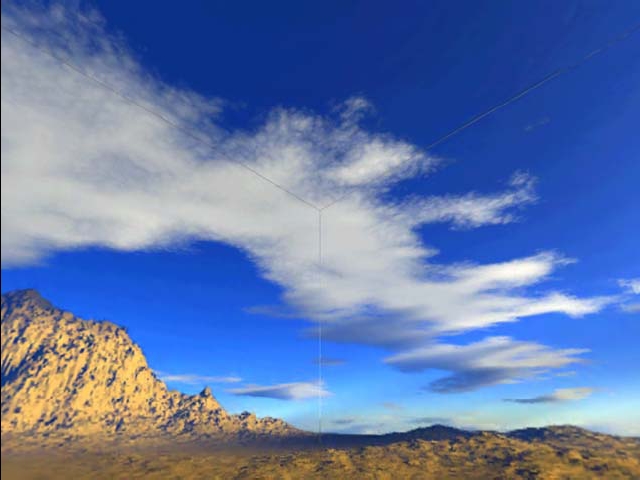
Cubemaps can show seams along the edges of the cube if they aren't mapped properly.
When a cubemap is rendered automatically in graphics hardware by a game engine, it will be seamless because it uses the Clamp uv address mode.
However if an artist manually creates a cube mesh and maps the six bitmaps onto it, usually this will cause seams from texture filtering. By default most materials use the Wrap uv address mode, which allows a texture to tile across a mesh. With a cubemap however this causes a sliver of the opposite side of each texture to be filtered into each edge. If your material has the option to use Clamp instead of Wrap, this will remove the seams.
There are some solutions for this:
- Set the texture coordinate address mode to Clamp instead of Wrap. Then the edge pixels will be sampled instead of the opposite side.
- 3ds Max doesn't support Wrap mode, but it does have Mirror mode. Use a Multi/Sub-Object material to apply the six cube faces to a Box model, and adjust the bitmap coordinates for each of the six bitmaps: change all four Offset and Tiling spinners to .5, and turn on both Mirror checkboxes.
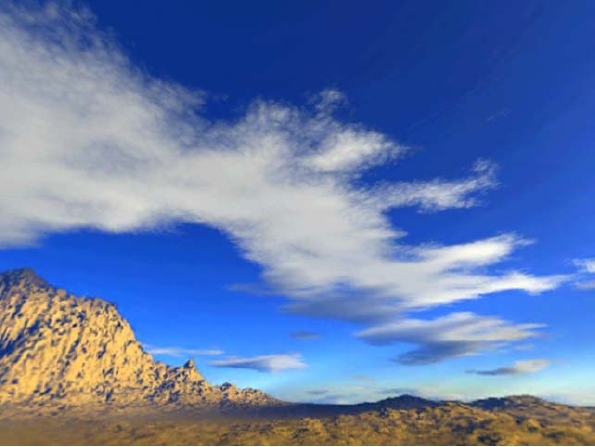
- For each face of the cube: increase the canvas size by a couple pixels all around, copy the edge pixels out a couple times, scale each face bitmap back down to a powers-of-two size, and scale the UVs down a little too. The PowerVR SDK has a tutorial about this in their docs.
|
| Seams on the edges of a cubemap. Image by PowerVR |
|
| Seams fixed via method 3. Image by PowerVR |
Resources
- Big cube map pack free cubemaps by Emil 'Humus' Persson and Kostas 'kodde' Gialitakis
- CG Textures - Panoramic Skies free sky panoramas.
- Philo's Sky Collection free sky panoramas.
- Dosch Design HDR Sets ($) HDR sky panoramas.
- Hyperfocal Design: Hyperfocal HDRI Skies (S) HDR sky panoramas.
- Marlin Studios Panoramica ($) sky panoramas.
- Johannes Schlörb: Dreamscape 2.1 Immersive Sky Backgrounds ($) CG sky panoramas.
- 1000 Skies ($) sky panoramas.
- Virtual Terrain Project: Sky / Atmospheric Rendering has links to sky texture sites.
Tutorials
- How the Hell do I make a cubemap with my own art? by Jude Godin
- Abstract skybox creation on the Polycount forum.
- Diffusely convolved cube map wiki page describes how to downsample cubemaps to use for lighting.
- An introduction to cubemaps - Tutorial by Zeller Samuel. A great introduction to cubemaps.
- Cubemaps Tutorial by CGTextures.com. Tutorial using Photoshop, NVIDIA's Photoshop plugin, and CubeMapGen to convert cubemaps into various layouts.
- Correct uvmapping for a cub to preview cubemap on the Polycount forum.
- Virtual Terrain Project: Sky / Atmospheric Rendering has many links to sky rendering resources.
- 360 HDR skies for sale? from the Polycount forums has a tutorial and links about photographing HDR skies.
- How to: Create a Terragen 2 Skybox by Outpt.
- 3dmotive.com - Creating a Skydome is a tutorial for converting a latlong sky into a spheremap layout and mapping it to a dome mesh with Photoshop and 3ds Max. More free tutorials here.
- Skymap workflow by divi is a quick tutorial about converting a latlong sky into a square dome-like layout that uses all the texture space. PDF here
- How to: Convert a Skybox to a Skydome by Outpt is an in-depth tutorial about converting a cubemap into a latlong image with CubeMapGen, HDRShop, Photoshop, and Unreal.
- Environment Cube Maps: HDR VS LDR thread on the Polycount forum.
Software
- Bixorama ($) panorama conversion utility (warning... conversions are aliased and jaggy).
- CubeMapGen from AMD.
- Cubemapgen physically based rendering mod by Sébastien Lagarde.
- DirectX SDK has the DxTex tool from Microsoft.
- DDS plugin for Photoshop from NVIDIA.
- Flexify ($) conversion filter for Photoshop.
- Generate Cubemap conversion tool for Unity
- HDR Shop ($) older version is free for non-commercial use.
- Hugin stitching and conversion tool. How to convert a cubemap into a panorama.
- Lys ($) GPU powered solution that generates Radiance, Irradiance and Specular textures from panoramic, Sphere or 2d cube map cross source textures for use with HDR Image Based Lighting.
- Pano2VR ($) conversion tool, used by CGTextures for all their panoramic conversions.
- PanoCube ($) conversion tool.
- Planettool command line conversion tool.
- Skypaint ($) cube map painting tool that requires Photoshop, Paint Shop Pro, or Photo Paint.
- Terragen is another popular skydome creation tool.
- Vue is a popular skydome creation tool.