Parallax Map
Parallax Map
Parallax mapping is a technique for real-time approximation of displacement mapping, sometimes called "virtual displacement mapping." Each pixel's texture coordinates are adjusted at render-time to create an illusion of depth as the viewer's eye moves across a scene.
The virtue of parallax mapping is efficiency. It is the cheapest real-time technique for displacement mapping. The drawback is image quality. Parallax mapping doesn't look as nice as more expensive techniques such as "parallax occlusion mapping" and "relief mapping", see Methods below. Those techniques are similar to parallax mapping, but provide better image quality at a cost of additional texture lookups.
Parallax mapping uses a grayscale heightmap. Exactly where it goes will depend on your specific game engine, but it's pretty common to put it in the alpha channel of the normal map. Check the documentation for your engine to make sure.
See the Polycount thread The ultimate be-all end-all Parallax mapping thread.
Methods
There are more than a half-dozen versions of parallax mapping:
- Offset, and offset with limiting (both are your basic parallax)
- Parallax occlusion
- Relief
- Cone step
- Steep parallax
- Pyramidal displacement
- Iterative parallax
- etc.
All except offset and iterative use more advanced rendering calls, only now becoming feasible on current-gen hardware.
If anyone is looking for a good rendering cost/visual effect tradeoff, look at iterative parallax, it is probably your best bet. Newer versions of parallax occlusion and cone mapping provide the best visual fidelity. And for the cheapest, parallax mapping is a couple extra instructions and a texture channel, almost negligible nowadays.
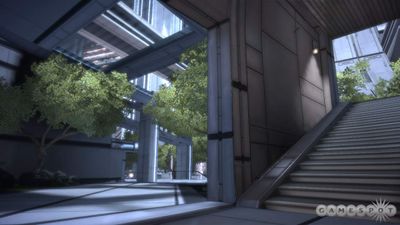
The staircases in Mass Effect (see below) probably have a specific parallax shader written for them; a generic parallax mapping solution would probably not give as believable an effect.
Detailed Surfaces Viewer by Bruno Evangelista is a demo application that shows multiple methods:
- Displacement Mapping
- Normal Mapping
- Offset Parallax Mapping
- Relief Mapping
- Parallax Occlusion Mapping
- Cone Step Mapping
- Multi-Layer Cone Step Mapping
- Sphere Tracing (Per-Pixel Displacement Mapping with Distance Functions)
Uses
As a rule, parallax mapping looks good on walls and floors. Any mesh with a relatively large surface viewed from non-oblique angles could be a decent candidate for parallax mapping. Parallax works well for smooth curves, like rocks and carvings. It's not good for steep edges, because of the distortion.
In your heightmap, try to avoid sharp/steep edges and tall high-frequency details. Those can cause texture-stretching and rendering artifacts.
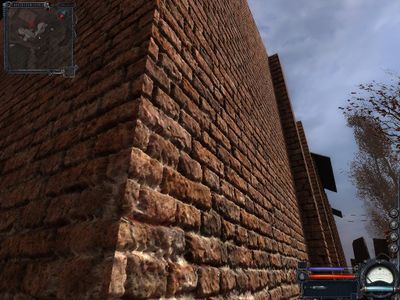
Use sparingly on any surface that is not relatively large. Be especially careful where the edges of a mesh are visible. Parallax mapping doesn't extend past the visible edges of a mesh. That can look weird. You may want to augment your parallax map with actual geometry at visible edges. (eg. bricks on the corner of a building might use actual geometry while the other bricks can be created by parallax mapping.)
Mass Effect uses parallax in an interesting way, to create stairs as a parallax indentation on what is basically just a flat plane.
| A parallax-mapped staircase in Mass Effect. Image by BioWare |
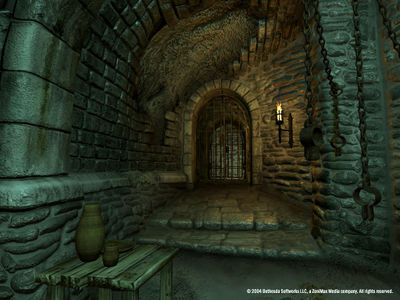
Parallax-mapped walls in The Elder Scrolls IV: Oblivion. Image by Bethesda Softworks |
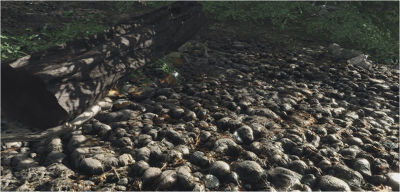
| Parallax occlusion mapping in Crysis Image by Crytek |
Steep parallax mapping in S.T.A.L.K.E.R. Image by Game World |
How To Create
CrazyBump
Using CrazyBump to generate a parallax map from a normal map:
- If necessary, grab the CrazyBump demo from www.crazybump.com
- Make sure that CrazyBump's axis orientation preferences are set correctly for your normal map.
- Open your normal map in CrazyBump.
- Make sure that "parallax displacement" is turned on in CrazyBump's preview window.
- Select the "displacement" tab from CrazyBump's user interface.
- Adjust the "displacement map" sliders until your model has the desired appearance.
- If you notice shimmering artifacts, try increasing the "soften" slider.
- You're all done! Save the displacement map, and use it for parallax in your game engine.
- If your engine expects height in the alpha channel of the normal map, CrazyBump has a toggle for that on the preferences page. Just turn on the setting, open your normal map, and re-save it.
CrazyBump can also generate a parallax map from a photograph.
3ds Max
Use 3ds Max Render To Texture to bake from high-poly geometry.
- Setup the projection for the low-poly model as usual.
- In the NormalsMap element in the render to texture dialog activate the checkbox "render height map to alpha channel".


