Difference between revisions of "ModelingBathroomTiles"
Cheeseplus (Talk | contribs) m (4 revisions) |
EricChadwick (Talk | contribs) (converted to wiki syntax) |
||
| Line 1: | Line 1: | ||
| − | |||
| − | |||
| − | |||
| − | |||
| − | |||
| − | |||
[http://www.valent.us/ okkun] says: | [http://www.valent.us/ okkun] says: | ||
| − | + | No need to be afraid of modeling your normal maps. I often see people struggle with bad source trying to get a good map out of the [http://developer.nvidia.com/nvidia-texture-tools-adobe-photoshop NVIDIA filter] or [http://www.crazybump.com Crazy Bump] instead of just building it. | |
| − | + | ||
| − | + | ||
| − | + | ||
| − | + | ||
| − | + | ||
| − | + | ||
| − | + | ||
| − | + | ||
| − | + | ||
| − | + | ||
| − | + | ||
| − | + | ||
| − | + | ||
| − | + | ||
| − | + | ||
| − | + | ||
| − | + | ||
| − | + | ||
| − | + | I made a quick walk through. It took me about 20 minutes. Without actually making a tutorial it shouldn't take you more than 5 to set this up. If I was actually going to use this I'd probably go back and change some things but you should get the general idea. | |
| − | + | ||
| − | + | ||
| − | + | ||
| − | + | ||
| − | + | The point isn't that it can't be done in PS but rather that it's not that hard or slow to do it in 3d giving you much greater flexibility and accuracy. | |
| − | + | ||
| − | + | ||
| − | + | ||
| − | + | ||
| − | + | For instance if you put a light on the wall using the tiles I created, the specular will look irregular and more realistic due to the slightly tilted tiles. You would have to hand select the random tiles in Photoshop (much more difficult) and then you would need to go into both red & green channels and push those colors to give the tiles different angles. Also if I need to change the with of my grout, angle of my edges etc., everything is instanced and very easy to work with. | |
| − | + | ||
| − | + | ||
| − | + | ||
| − | + | ||
| − | + | <gallery mode="nolines" heights=450px widths=650px> | |
| − | | | + | okkun_tiletut_12.jpg|End result. |
| − | | | + | okkun_tiletut_01.jpg|Step 1. |
| − | | Step 11. < | + | okkun_tiletut_02.jpg|Step 2. |
| − | + | okkun_tiletut_03.jpg|Step 3. | |
| + | okkun_tiletut_04.jpg|Step 4. | ||
| + | okkun_tiletut_05.jpg|Step 5. | ||
| + | okkun_tiletut_06.jpg|Step 6. | ||
| + | okkun_tiletut_07.jpg|Step 7. | ||
| + | okkun_tiletut_08.jpg|Step 8. | ||
| + | okkun_tiletut_09.jpg|Step 9. | ||
| + | okkun_tiletut_10.jpg|Step 10. | ||
| + | okkun_tiletut_11.jpg|Step 11. | ||
| + | </gallery> | ||
| + | Images by [http://www.valent.us/ okkun] | ||
---- | ---- | ||
| − | [[Category:EnvironmentModeling]] [[Category:EnvironmentTexturing]] | + | [[Category:EnvironmentModeling]] [[Category:EnvironmentTexturing]][[Category:EnvironmentModularity]] |
Latest revision as of 13:39, 24 March 2015
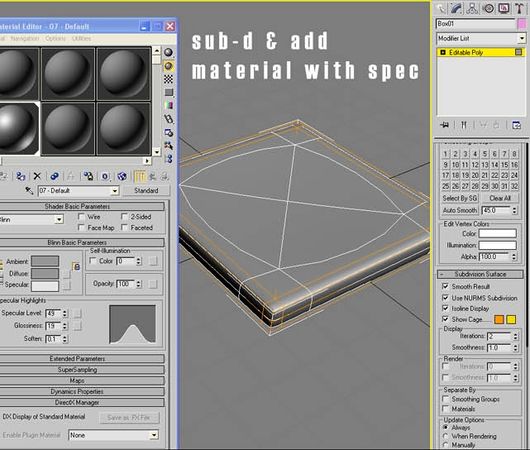
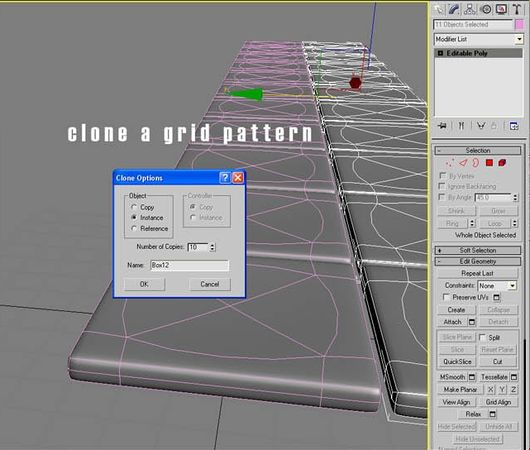
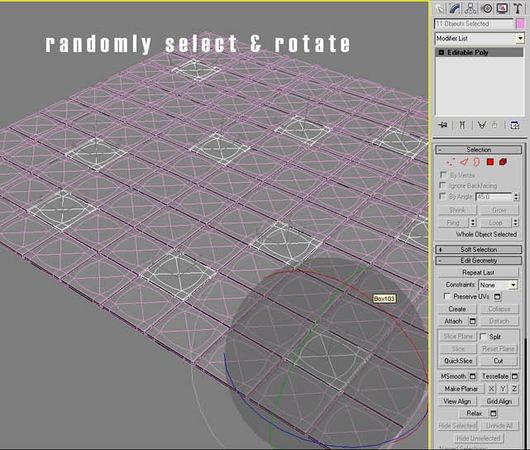
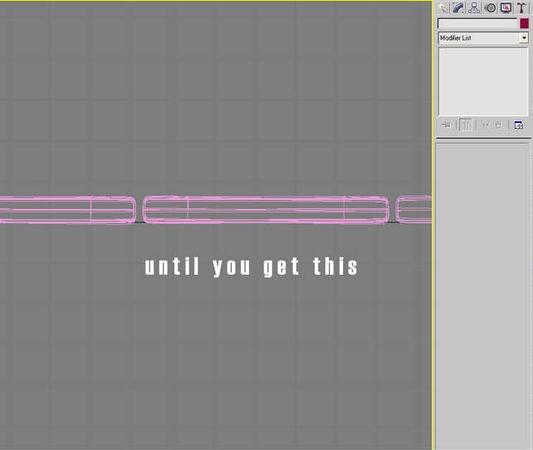
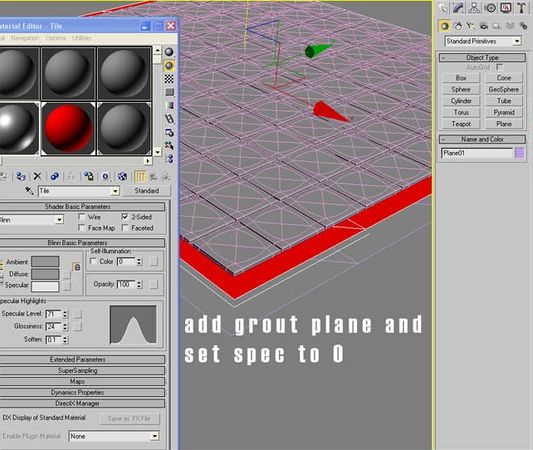
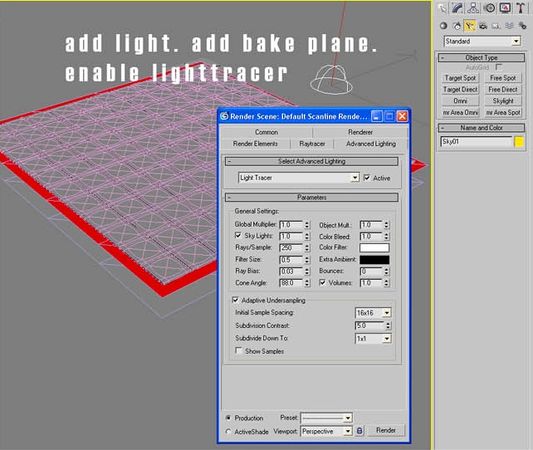
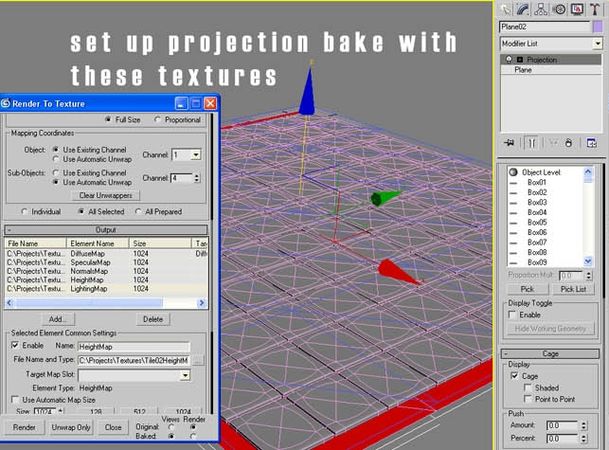
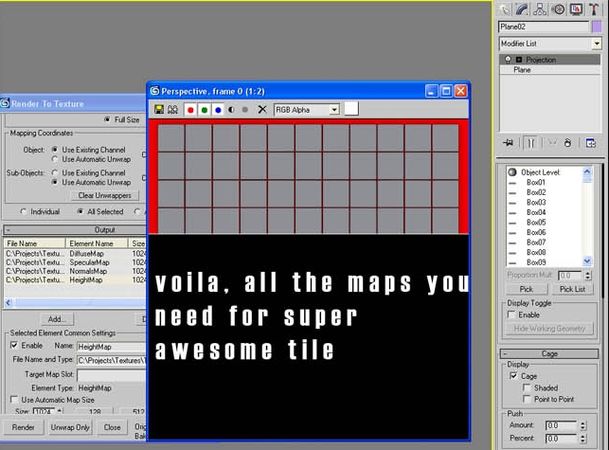
okkun says:
No need to be afraid of modeling your normal maps. I often see people struggle with bad source trying to get a good map out of the NVIDIA filter or Crazy Bump instead of just building it.
I made a quick walk through. It took me about 20 minutes. Without actually making a tutorial it shouldn't take you more than 5 to set this up. If I was actually going to use this I'd probably go back and change some things but you should get the general idea.
The point isn't that it can't be done in PS but rather that it's not that hard or slow to do it in 3d giving you much greater flexibility and accuracy.
For instance if you put a light on the wall using the tiles I created, the specular will look irregular and more realistic due to the slightly tilted tiles. You would have to hand select the random tiles in Photoshop (much more difficult) and then you would need to go into both red & green channels and push those colors to give the tiles different angles. Also if I need to change the with of my grout, angle of my edges etc., everything is instanced and very easy to work with.
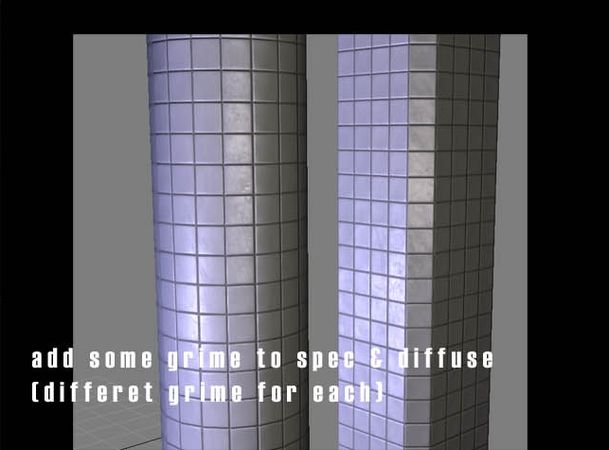
End result.
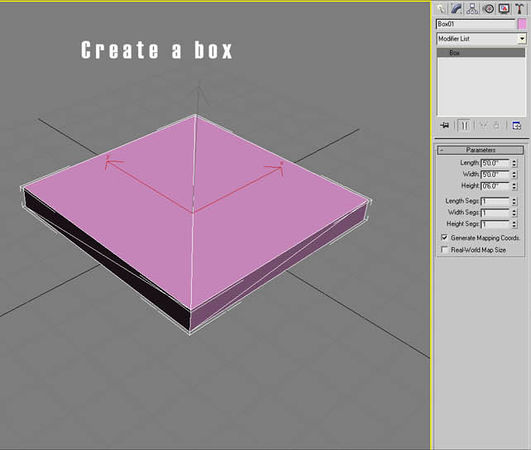
Step 1.
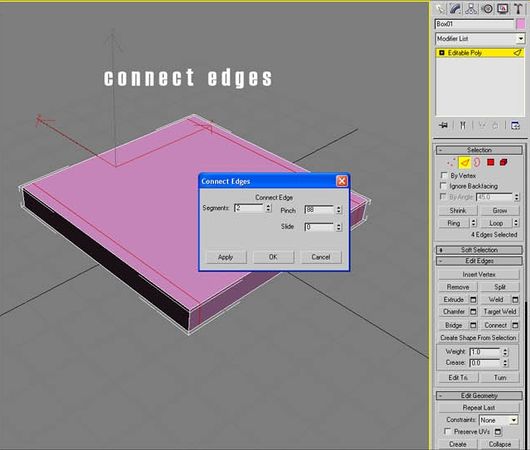
Step 2.
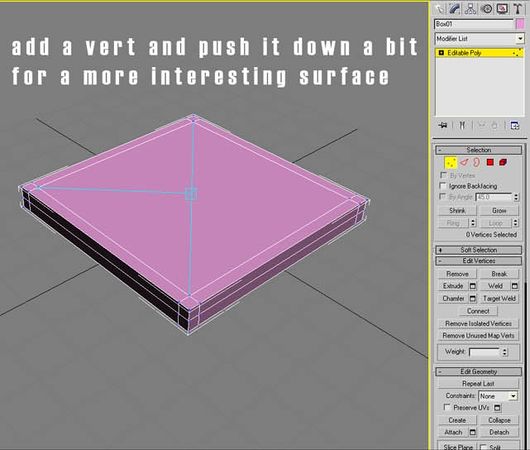
Step 3.
Step 4.
Step 5.
Step 6.
Step 7.
Step 8.
Step 9.
Step 10.
Step 11.


Images by okkun