Difference between revisions of "Transparency map"
EricChadwick (Talk | contribs) (→Blending Operations: Blends | Unreal Engine Documentation) |
EricChadwick (Talk | contribs) (→Blending Operations: redirect) |
||
| Line 137: | Line 137: | ||
== Blending Operations == | == Blending Operations == | ||
| − | + | See the page on [[MultiTexture#Blending_Operations|MultiTexture]] | |
| − | + | ||
| − | + | ||
| − | + | ||
| − | + | ||
| − | + | ||
| − | + | ||
---- | ---- | ||
[[Category:Texturing]] [[Category:TextureTypes]] | [[Category:Texturing]] [[Category:TextureTypes]] | ||
Latest revision as of 09:40, 20 May 2020
A transparency map controls per-pixel transparency. It is also called an Opacity Map or Alpha Map.
Contents
Transparency Mapping
Usually transparency is stored in the alpha channel of a DiffuseMap. However transparency can be stored in any channel of any bitmap (red, green, blue, or alpha) since each channel is really just a range of grays. The shader will control which channel you need to store the transparency map in.
The DiffuseMap.
The diffuse map's AlphaChannel.
An alpha channel typically allows 256 grays. Some texture formats use a smaller range like 16 or 8 or 2 (which is just black and white). Some visual examples can be found under Alpha Bit Depths. The less grays there are, generally the smaller the file size will be which saves memory, however this can reduce the visual quality of the transparency. It's a trade-off.
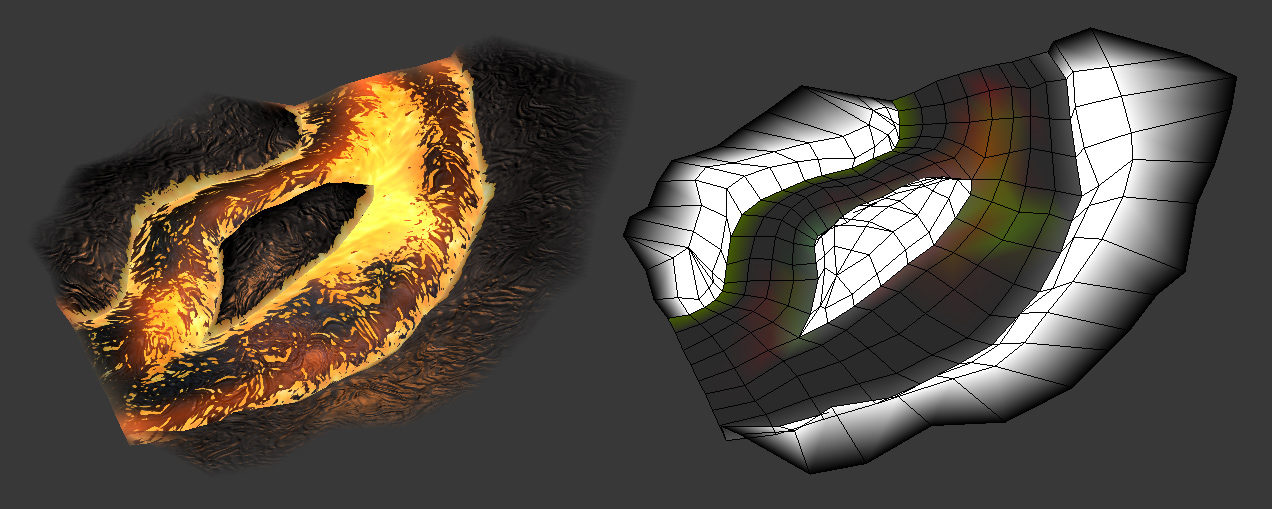
Vertex alpha can also be used for per-vertex transparency. It is generally more coarse than mapped transparency, since it relies on the topology of the model. However it doesn't use as much memory as a bitmap. Vertex alpha can be used at the same time as bitmap-based transparency, allowing greater control. However the shader must be specifically written to support vertex alpha.
Transparency Techniques
There are a variety of methods available for real-time transparency, each with their own benefits and drawbacks.
Alpha Blend
Alpha blend is a soft transparency technique, where you can use a full gradient of transparency values, for soft-edged transparency and partial translucency.
Usually you get 256 levels of gray, white being totally solid and black being totally transparent. Some textures use less grays to compress the file size in order to save memory. However, they are usually filtered when rendered, which can soften any artifacts.
Alpha blend can be FillRate expensive. Overlapping alpha-blended meshes, like particles or tree leaves or grass, increase the fill rate because the same screen pixels are drawn over and over again. An expensive fill-rate usually causes a slower framerate.
- Faking Volumetric Effects by Stephen Jameson has implementation details for making alpha blended smoke effects in Unreal, although the fill-rate cost is very high when using a bunch of overlapping transparent planes.
- Boiler Room - 2009 by Eric Testroete shows how to use a custom Shader FX shader to created alpha-blended volumetric light cones.
Unfortunately alpha blend often has Sorting problems.
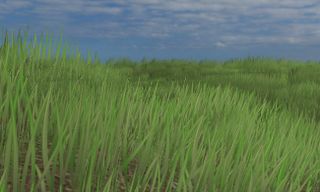
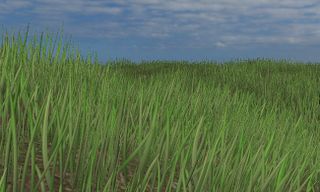
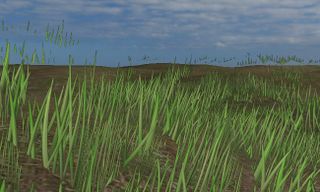
Grass using alpha blend, with 2-pass depth sorting.
Image by Eric Chadwick.Grass using alpha test.
Image by Eric Chadwick.
Alpha Test
Alpha test is a totally-hard transparency technique, the pixels are either completely solid or completely clear, there are no soft edges. Each screen pixel is tested by the shader to tell if it should be on or off, using a threshold value. Alpha pixels darker than the threshold are clipped out, brighter alpha pixels are left solid.
There are no depth sorting problems with alpha test, but there's also no anti-aliasing so it can get very pixelly at a distance. Alpha test is much faster to render in real-time than alpha blend.
You get better results if you use a smooth grayscale in your alpha. If you use an alpha that's only black and white but no grays, you tend to get large stairsteps when it is alpha tested. The DXT1 texture format has only on vs. off for transparency... it is half the file size of DXT5 (smooth alpha), but the trade-off is blocky edges.
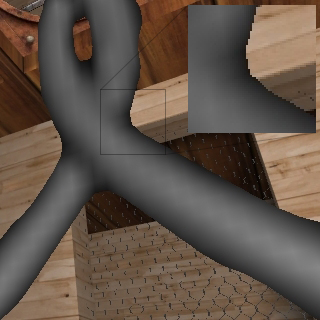
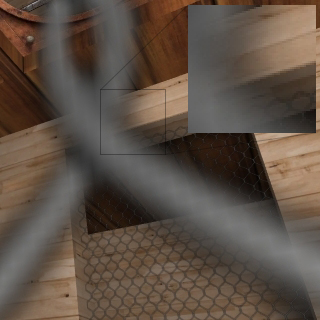
Alpha test with 8bit alpha vs. 1bit alpha. Alpha tested models (left), alpha channels (right).
Image by Eric Chadwick.
Screen Space Stipple
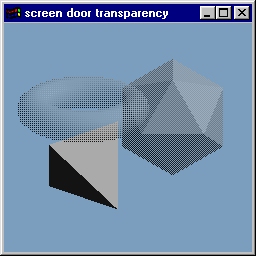
Screen space stipple uses the alpha test method but tries to fake the soft edge of alpha blend by drawing/not drawing pixels in dither patterns, at the resolution of the screen pixels. This is often called screen door transparency.
It writes depth and doesn't blend, so it's fast and cheap and it doesn't have any sorting problems. The downside is that it's not really transparent (it's just on/off) and at low screen resolutions it looks horribly pixelated.
Alpha To Coverage
Alpha-to-coverage is similar to alpha test in that it requires no depth sorting, so you can avoid sorting artifacts. The technique uses multisample anti-aliasing (MSAA) to give a softer edge. This allows for about 9 levels of transparency, though these are dithered together to give more apparent levels of transparency. It renders in a single pass, but it requires at least 4x MSAA which is only available on newer hardware (NVIDIA GeForce 7 and later).
Humus has a demo on his site, with sample code. Marmoset Toolbag also has alpha-to-coverage support. Humus' contrast technique boosts the alpha contrast around 0.5 when the texture is magnified so that the [0, 1] range of alpha values spans over the width of a pixel. This makes the edges as sharp as with alpha testing, but the edges look properly antialiased.
Above images by Emil 'Humus' Persson.
Signed Distance Alpha Test
Signed distance alpha test is also similar to alpha test, except it allows the texture size to be extremely small and still get decent results. Valve Software has a paper from SIGGRAPH 2007, Improved Alpha-Tested Magnification for Vector Textures and Special Effects. Gamedev.net has a thread with pictures, and a couple more threads with a demo app (in the comments).
Images by Valve Corporation.
Hybrid Approaches
- Rendering Plants with Smooth Edges from the Wolfire Blog shows various tests and a hybrid alpha-test/alpha-blend approach.
Sorting Problems
If you use alpha blend, and the model has overlapping transparent surfaces (like hair or grass) then the depth sorting will probably be bad. Parts of the background will show through, instead of the other transparent surfaces. There are various solutions to this, depending on what your game renderer supports.
Grass using alpha blend, and no sorting.
Image by Eric Chadwick.Grass using alpha blend, with 2-pass depth sorting.
Image by Eric Chadwick.
Why Does This Happen?
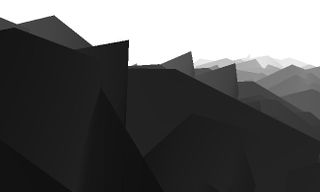
Most surfaces in a game are sorted using the Z-Buffer, which is a hardware-accelerated rendering of the depth of the scene. This allows the renderer to draw each pixel the least amount of times, by not rendering any pixels that are covered by other ones. However with translucency each pixel needs to be drawn more than once, and each of those "draws" has to be sorted in the right order or you get errors. Unfortunately though the Z-Buffer disregards transparency completely, it only renders all polygons completely opaque. This means it generally can't be used for sorting transparent polygons.
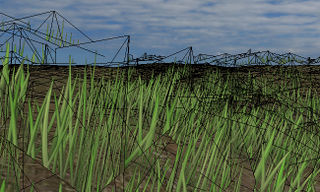
Grass with alpha blend not sorted, and wireframe.
Image by Eric Chadwick.The Z-Buffer ignores alpha.
Image by Eric Chadwick.
To draw a transparent surface the renderer has to figure out all the things to render behind it, so it has a "behind" color that it can blend each partially-transparent pixel with. The renderer basically needs two colors for each blending operation, the source (the surface's pixel) and the destination (whatever is behind).
For speed usually a game renderer tries to find the destination color the fastest it can. To sort separate surfaces, the renderer will compare the center of one surface with the center of another, to figure out what's in front (source) vs. behind (destination). As long as the two surfaces don't intersect each other, they'll be rendered in the right order.
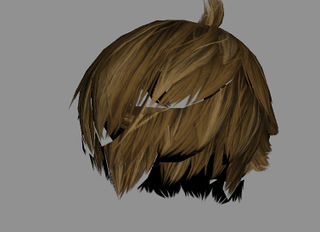
The most problems happen when trying to render multiple transparent triangles within the same surface, like hair planes on a character's head. Because it's usually too slow to compare the centers of all the triangles, a game typically just renders the triangles in the order it receives them. Which is usually the order the artist has modeled them.
Alpha blended hair with sorting errors.
Image by 'Ioncannon'.
Maya offers a Viewport 2.0 method called Depth Peeling which often improves transparency sorting in most situations. The viewport is rendered in 2 to 10 passes (adjustable in the settings) which are combined into each final frame. For details see the Nvidia whitepaper "Interactive Order-Independent Transparency". However depth peeling is still too expensive to use in most 3d games.
- Depth sorting alpha blended objects by Shawn Hargreaves is a great description of how alpha blending is rendered in a game engine.
Sorting Fixes
Because a game renderer typically renders triangles in the order they were made, an artist can often fix sorting errors by manually re-ordering the vertices.
A renderer usually draws vertices in the order it receives them; this can be exploited to help it draw alpha blended surfaces in the order that's desired. The behind-most faces are drawn first, and the front-most faces are drawn last, with the rest drawn in order between those.
Simply detach each overlapping transparent element into a separate object, then re-attach them in the order you want them to draw. As long as the elements do not interpenetrate themselves (or others) then they should sort correctly. This doesn't need to be done for each triangle, typically it can be done for multiple-triangle elements, like hair pieces. The trick is to figure out which angle the overlapping elements will most commonly be seen from, and work towards that.
In Maya, Mesh>Combine will append each new object to the end of the vertex order. In 3ds Max, EditablePoly>Attach does the same.
3ds Max has three quality settings for viewport transparency: None (alpha blend or off), Simple (alpha test), and Best (alpha blend). However the settings do not affect DirectX Shader materials, they only seem to affect Hardware Shaders. See Best shader for viewport hair planes (3dsmax) and Maxscript Idea: Sort Alpha Order on the Polycount forum.
Maya supports per-polygon sorting with transparent CgFX shaders. In the Maya viewport under Shading, turn off object transparency sorting and turn on polygon transparency sorting. This tells Maya to sort each polygon by its center, rather than each object. Maya detects whether the blending state is enabled in the first pass. If blending is enabled, Maya uses the Object Transparency Sorting or Polygon Transparency Sorting options in the viewport to correctly render the transparent shader. However this may not fix all sorting errors, so manual vertex-re-ordering may be needed.
Unreal Engine 3 offers several sorting methods, see UDN - Three - TranslucentHairSorting.
Blending Operations
See the page on MultiTexture


