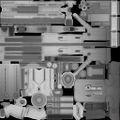
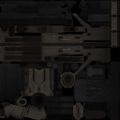
Ambient occlusion map
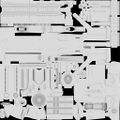
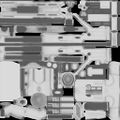
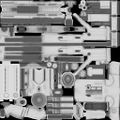
An Ambient Occlusion (AO) map creates soft shadowing, as if the model was lit without a direct light source, like on a cloudy day. Similar map types: Cavity Map, Crevice Map, Curvature map, Dirt Map.
Typically the AO map is blended into the diffuse map, instead of being stored as a unique bitmap, because this saves memory. However this generally creates incorrect lighting because an AO map should only mask ambient lighting, not diffuse lighting. If the AO is stored as a 2nd texture, it usually is baked with a 2nd set of UVs that do not overlap or mirror, as diffuse often does.
AO is usually pre-computed (baked) because it is created using a non-realtime ray-casting lighting solution. It can either be stored in a texture, or it can be stored in the vertex colors of the model. Screen Space Ambient Occlusion is a realtime AO method that does not require baking at all, but it requires a more recent graphics card and has some shading errors.
Quick question about ambient occlusion maps on the Polycount forum has discussion about when to include ambient occlusion in the Diffuse map, and when not to.
Contents
3ds Max Baking Methods
- Mental Ray - Ambient Occlusion walkthrough - 3dsMax 2011 and earlier - by Don 'Ott' Ott- mental ray AO baking, step by step.
- Ambient Occlusion Baking - by Laurens 'Xoliul' Corijn - Comparing the positives and negatives of five AO baking methods in 3ds Max.
- Techniques for Creating Shade Maps - by Epic Games - How Epic uses the mental ray Ambient Occlusion shader in 3ds Max to bake for Unreal Engine 3.
Floating Mesh Problem
When creating the high-poly model for a Normal map, mesh details can be "floated" above the rest of the mesh, instead of cutting them into the rest of the mesh. However this can also cause errors in the ambient occlusion, which need to be painted out or removed. There are a couple different methods to solve this.
Object Properties Method
This is the simplest method, as long as your floaters are separate objects.
- Select the floater meshes.
- Right-click and choose Object Properties.
- In the General tab, disable Cast Shadows.
- In the Adv. Lighting tab, disable Cast Shadows.
Disabling "Cast Shadows" in Object Properties.
by Frell.]]
Joe 'EarthQuake' Wilson wrote: "In xnormal there is an option to disable backfaces when rendering ao, this fixes the "shadow around the floater" problem by about 95%, you'll still have to manually do a few tweaks, but in generally it saves a LOT of time. I think you can do similar things in max by disabling shadow casting and enabling backface culling on your floater object, by going to the object properties or something."
Light Tracer Method
Floaters can leave unwanted shadows; Light Tracer filters these out.
by Sean "Oniram" Marino.Wireframe for the floaters.
by Sean "Oniram" Marino.
When baking AO in 3ds Max with Render To Texture, the Ambient Occlusion (MR) element can leave shadows underneath floaters as well, which is usually unwanted. To avoid this you can use the Scanline renderer along with a Skylight, Light Tracer, and the Complete Map element to filter out those shadows. Supersampling may also be required, if any floaters are creating sharp aliased edges.
Mental Ray Method
If you use the mental ray renderer to bake AO in 3ds Max / Maya / Softimage, you can manually define the Max_Distance. This is set to 0 by default which means occlusion rays will be cast an infinite distance. If you set it to a value lower than the distance between your floaters and the surface then the problem is fixed. This way you get to keep the Falloff and Spread settings giving you nice cavity shading that the Light Tracer can't do.
For every pixel rendered a cone of rays is shot from its world space position. These rays won't return hits for faces more than the Max Distance. So faces further than the Max Distance from the pixel will not cause occlusion shading. The end result is corners and contact areas will get shadowed but the floaters wont.
Alternatively, you can disable rendering the back faces on the highpoly/floating objects to prevent them from contributing to occlusion.
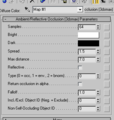
The Ambient/Reflective Occlusion map in 3ds Max.
by Robert "r_fletch_r" Fletcher.The normal map (left) and the AO map.
by Robert "r_fletch_r" Fletcher.The mesh, showing the floater at center.
by Robert "r_fletch_r" Fletcher.
EarthQuake's Baking Method
Joe "EarthQuake" Wilson explains how he combines low-poly AO with high-poly AO to get better results.
Finished asset with AO.
by Joe "EarthQuake" WilsonWithout AO.
by Joe "EarthQuake" Wilson
- UV your low-res mesh.
- Make a copy of low-res mesh.
- Explode both the copied low-res and the high-res.
- Save out the original low-res mesh.
- Bake the ambient occlusion from the exploded high-res mesh to the exploded low-res mesh.
- Load up the original low-res mesh in xNormal's Simple AO Tool and bake at the same resolution as your other textures.
- Composite the low-res AO with the high-res AO, edit out the shadows on parts that need to move, etc.
This could also be done with 3ds Max or another program if you don't like the quality of the Simple AO Tool for low-res meshes. I usually blur the map a little and spend a few seconds painting out errors. Also be sure to make a layer mask for parts of your mesh that would need to move, so they don't get ambient occlusion on them.
Theres actually a few extra practical advantages to doing it this way as well:
- When using floating geometry, you'll often get AO artifacts that you need to paint out, if your mesh is exploded and you have separate layers for high and low frequency AO its easier and quicker to paint out these errors that it is when you have the small shadows along with the large shadows both in the same texture.
- Matching the exact silhouette of the low-poly is actually a more desirable result than that of the high-poly. Example: You have a 32 sided cylinder intersecting with some other shape, if you bake the AO directly from the high-res you'll get a perfectly round shape. If you bake it from the low-res you'll get a shape that actually fits your model instead of just hurting the mesh by point out how jagged your low-res really is (via the contrast from the 12 sided guy casting a perfectly round shadow, not matching up correctly etc.).
Images of what goes into my lightmap for a texture:
1. AO from exploded high-res mesh.
by Joe "EarthQuake" Wilson2. AO from non-exploded low-res mesh.
by Joe "EarthQuake" Wilson3. 1 and 2 combined.
by Joe "EarthQuake" Wilson4. Gradient baked, detail map overlaid, etc.
by Joe "EarthQuake" Wilson5. Final diffuse.
by Joe "EarthQuake" Wilson
Blender Baking Methods
- Baking AO maps for terrain using Blender 3D - by KatsBits - Baking ambient occlusion in Blender.
- Floating Geometry Overview - by Andy 'metalliandy' Davies - Video tutorial about creating floaters and baking in Blender.
Maya Baking Methods
- Maya ao !! :@ from the Polycount forum.
- Ambient Occlusion in Maya 8 - by Ben Clark- Baking ambient occlusion in Maya.
Xnormal Baking Methods
- Ambient Occlusion in XNormal - by Donald Phan - Baking ambient occlusion in Xnormal.
Softimage / XSI Baking Methods
- XSI Ambient Occlusion Methods - by Michael Taylor- Baking ambient occlusion in Softimage.
Vertex Color Baking Method
- Baking AO to Vertex Color can be an inexpensive way to store typically expensive information. See AmbientOcclusionVertexColor for more information.


